Showing posts with label how to. Show all posts

Tuesday, July 20, 2010

A toy and a treat

The other day I came across a post over on Zach Aboard,  and looking for something simple and fun for the children to play with in the garden it seemed just the thing. Flying comet balls, picture a comet flying through the air the tail ablaze. All that is needed is wool roving to make a felted ball, and a piece of silk for the tail. To make the ball all that is needed is dish soapy hot water and friction between the hands, yet do check the link above for a full tutorial if needed.
Once you have a dry felted ball,  sew a silk tail around the center of the ball, 
 throw it and watch it fly, simple as that...
The children had so much fun with these simple toys, not only throwing them high into the air and catching them, but also running or swinging with them watching the tail follow, 
so simple 
and such a joy for them.
Another inspiration came from Childhood Magic, I am always looking for fun ways to serve cold treats to the children on these hot summer days, they simply love anything that comes in frozen form, and these little frozen orange cups have now become the new favorite. Kaleena told me that this was her favorite dessert, so delicious!
All you do is squeeze the juice of and orange, or however many you are making (make sure the oranges are washed and organic, as the children end up with half the rind in their mouths), then simply pour the juice back into the orange "cups" and freeze.
For an extra treat, I used a piece of mango, and a few strawberries in the ones below, blended it with the juice and froze, we will have those tomorrow.
Kaleena kept checking on them right up until bed time, they may have to become breakfast tomorrow, she is so excited to have them. 
I was thinking that they would be a lovely treat for a children's celebration.
And remember (if you live where it gets cold in winter), to dry out your orange rinds in the sun, to use as fire starters and to scent your home with lovely orange on a cold winters day..
So grateful for all the lovely inspiration out there
~Have a wonderful day~

Thursday, July 15, 2010

Personalized mealtime napkins

The other day while browsing a local thrift store, I came across some white cloth napkins. 
Since a long time I have had the idea to sew our own napkins, one set for each day, each day it's own color, but have not quite gotten to it yet, one of these days though:) Anyways we picked up the napkins, and decided to personalize them using the glue batik method. Very simple and ever so enjoyed by the children. 
Yesterday we drew our pictures on a napkin each, 
I did one for papa, and inspired by Kaleena we all put our name on them, well I did:)
(we used Elmers blue gel glue)


Today following a few hours of yard work we got out the acrylic paints. 
The children just adore painting, no matter what kind of painting, 
it really get their creative juices flowing.
I wet the napkins in cold water before we started. 
Look at those colors

Once they were all painted I laid them to dry in the sun, and once dry I soaked them in hot water to get the glue out, and then rinsed them really well in cold water. The one for papa, had thicker paint, and was not quite dry when I rinsed it, and therefore lost some big patches of paint, so it is important for them to be completely dry before soaking. This is what they looked like after the cold rinse. I felt they still had quite a bit of paint so I put them in the washer after. Once dry and ready to use the color was a bit more faded than what it shows here, and they really look great. We used them at the dinner table tonight, and loved having homemade art work to clean our face and hands with:) Lovely project!


~Have a wonderful day~

Wednesday, July 14, 2010

Dragonflies, owls and bats


Whenever we go for walks, go to the park or obviously to the country, we always come home with pockets or baskets full of natures treasures. Last week in the park we found seed pods on a tree 
(it was not the maple), that closely resembled the wings of the beautiful dragonflies. Kaleena immediately saw the resemblance and wanted to pick sticks to then make some at home. Her and I made a couple that evening, but today we really got inspired. On our morning walk we picked more sticks, pine needles and little acorns. We set up with the children's glue guns, and ended up with a complete gathering of little creatures.
We sat for a couple of hours I'd say, even Keenan was so involved in the 
creation of his little animal friends.
This was Kaleena's first dragonfly before the eyes were added
this was Keenan's
this was Keenan's hedgehog
this was mine
Kaleena's bat
and her owl
and a gathering of fireflies ready to take flight.
We made different versions, and some we used little glass beads for eyes, other we used 
little green seeds we found i the park this morning.
I glued them to a bouquet of sticks, to make them part of a nature table for the porch, that I suddenly felt inspired to make


and here it is.
I love the whimsy of all the little creatures. 
The children enjoyed this project immensely, truly they enjoy all projects that include hot glue, and I just adored to see them recognize an animal friend in every piece of material they picked up. It was 
very rewarding to observe and be apart of.
ohh our little 1000 leg caterpillar:)

I still plan to add some glitter to the wings of the dragon flies, but currently don't have any. I love them
 all natural, yet dragonflies are endowed with glistening colors, so I do want to add some. I have decided to get some glitter recommended by Twig and Toadstool, I also serendipitously saw some fabulous dragonflies on this blog the same day we brought home our wings. She recommends  Martha Stewart's gem stone glitter for superb glitter effect, so clearly I must try this.

Thanks for looking in
~and happy creating~

Monday, July 12, 2010

Homemade mosquito repellent

Yesterday I had a lot of mulching to do, my sister has commissioned me fix up her yard.
I do wish I had some before and after picture of the shade garden I put in for her, but that was before I started blogging and documenting everything.
Anyhow, as it is a shade garden and right by a little creek there is typically loads of mosquitos. And the times of the early morning or at dusk when it it not too hot to work, even more so.
I have long been wanting to make a homemade mosquito spray, as I do not like to use regular repellent, and find that the natural versions from the health food stores, does not work very well.
I found this idea on The Herb Gardener, this spray includes garlic and cayenne pepper, and to that I added some yarrow. I used I'd say 6-7 big cloves, smashed them up skin and all, put them in a food processor with about a cup of water and 1t of ground up cayenne powder, the recipe calls for fresh peppers, but I did not have any on hand. 
To this I added a good amount of yarrow, flowers leaf stem and all.
Mashed it up really good in the food processor, I love the way it looked and even smelled, I do love garlic, and then I set it in the sun for a few ours 
before straining it through cheese cloth into a spray bottle.
Once strained I added a few drops of lavender essential oil.
I applied a liberal amount to my skin, wondering if the cayenne was going to burn in any way. It did not,
it did feel a bit sticky at first but once dried that went away. I think it worked really well, perhaps not 100%, yet really well, I could do all my mulching without feeling the constant attack of the mosquitos and when I came inside had not one bite.
This may not be the repellent I would use if I was going to town, well actually I rarely put on repellent, but for garden work or a hike at twilight this is the perfect solution for me, with the added bonus of absorbing the benefit of the garlic through the skin.
~Happy rainy monday~.
Yeah, we are getting some rain:)

Sunday, July 11, 2010

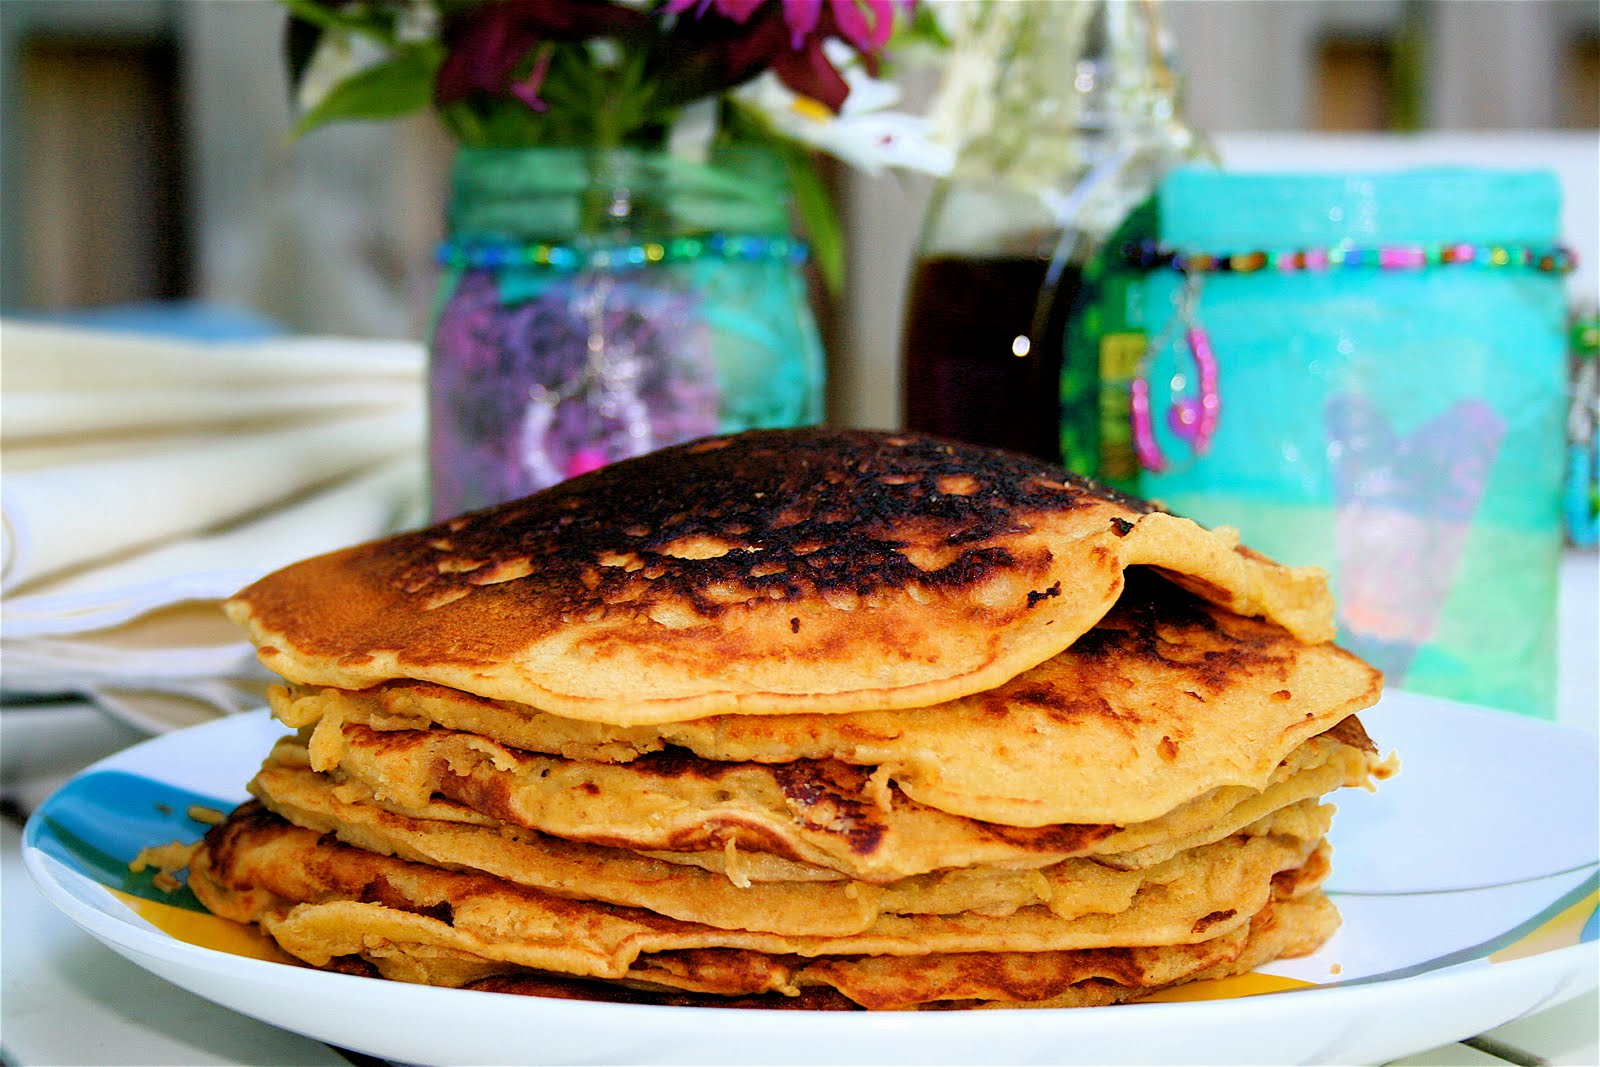
Sunday morning pancakes

Good sunday to y'all. 
We have a long standing tradition of sunday morning pancakes in this little family of ours.
We all love it and look forward to it.
What makes these pancakes especially delicious is the overnight soaking.
I use homemade buttermilk, well not true buttermilk because I do not YET make my own butter.
All you do to make homemade buttermilk, is add a bit of your previous batch, or some store bought so long as it has live cultures, to some milk and place it in a glass jar on top of the fridge over night, shaking it whenever you pass by it. The next morning it will have thickened, depending on the temperature it may need a little longer. Once thickened I set it in the fridge where is lasts for weeks if need be. I use a half gallon glass jar, put a little less than a pint (1/4 Liter) of buttermilk in it, and add my fresh milk to fill the jar to about 3/4 full.
Right, so back to the pancakes, for our family I use about a quart of my buttermilk, to this I add different kinds of flour, usually some whole wheat pastry, some whole spelt flour, a little white flour, I also add rolled oats, and last night I added some dried coconuts into the mix, which was a big hit.
Sorry I cannot give exact measurements as it is a little different every time, I go by texture, and the texture should be somewhat firm, yet you should still be able to stir it:)
Then I pop a lid on it and leave it over night.
The next morning I add two eggs, a pinch of cardamom, some vanilla, a little honey, a little salt, 2t of baking powder, and 1t of baking soda. Once this is all stirred in, the batter is really light and fluffy.
I heat up my black pan, I LOVE my cast iron skillet and rarely use anything else, can't say exactly why, I just do and it gets better with time, if you haven't yet you must try one:)
And then fry the pancakes as you usually would, I use a little butter.
So yummy, and because of the soaking they are really spongy, and so much easier for the body to digest.
They really feel much healthier this way. Because of this I generally soak any grain or flour before use.
(something I picked up from Sally Fallon some years ago)
Try soaking your oats overnight before making the oatmeal in the morning, they cook up so fast, and are much better for you. Ok, enough of that!
And I had to share this beauty from today, how gorgeous is that?! 


~Happy eating~

Saturday, July 10, 2010

Felted play mat

Today, inspired by our desire to do a larger felt project, Kaleena's wish for a little mat to set the scene for her fairy to play with the frogs by the pond, and finally by a tutorial over on Morning Sun Rea on how to actually make such a mat, we set about creating these precious little mats, well in Kaleena's case not so little. 
We used wool roving, the beautiful greenish wool in  the bag is from Spinning Awesome Good, I have had it laying around for a while waiting for a special project to use it, and what better project than a meadow surrounding a pond. 
Right, besides wool roving we used hot dish soapy water, and bubble wrap.
We laid out the bubble wrap and started layering the wool, spreading the wool into very thin pieces, criss crossing them to make a thick layer of wool upon wool, until we had something looking like this
(in retrospect, we should have added more and made it thicker, especially where the meadow and pond met, Rae did mention this in her tutorial, click the link above to see her tutorial, I thought we had it covered but not quite) 
Then we squirted hot soapy water over the mat to make it quite wet 
(a jar would work well, my soap was almost out so we 
used that container but it had to be refilled several times)
then we folded the extra bubble wrap over the mat, and started felting the wool, by pressing and smashing and squishing the wool between the wrap.
(we had made Kaleena's mat too big, so the wool came out around the edges, once you start felting, the wool thins and spreads, so leave space around the edges for the mat to spread out)
Keenan loved this part, he was smashing his mat happily for a long time
then we rolled it up into a sausage shape and rolled it and rolled it felting it further
Keenan unrolled his and smashed some more, soap spraying everywhere:)
This is what Kaleena's looked like after all the rolling and squishing.
I then brought it to the sink, and rinsed it in first cold water then hot, and then cold again, and then put it in the dryer for a few minutes, and then left it in the sun to dry completely.
 (Rae said to put tennis 2 balls in with the mat, yet I did not have any, so I put in a pair of little person shoes, don't do that! the mat got all kinds of bumps on it, they gave it texture though and it still came out lovely)
Here is Keenan's mat all dried and set up to play
And here is Kaleena's, don't you just love the different shades of the meadow.
Kaleena added some wooden blocks we made for her years and years ago, well 4 years at least:) we never even got around to protect them with beeswax or oil, and they are still perfect. We do need to make some more of those.
And here is her sweet fairy feeling right at home sitting on crystals by the little pond.
Keenan added some blocks and some of his cars and little animals to his little scenery.
It was such a lovely project, the children really enjoyed it, and I am sure we will be making more of these open ended toys. Gotta love it!!!

~Happy creating, and thanks for looking in~