Showing posts with label craft. Show all posts

Saturday, November 20, 2010

Leather pouch for treasure collecting; Handmade Holiday

Today I made Kaleena this sweet leather pouch for her to bring along on hikes, to keep all the treasures she gathers.
Inevitably when we go out into nature she finds treasures of all kinds and they usually end up in my pockets, as well as her own. I thought this bag would be a lovely little bring along pouch to keep safe all those lovely finds. It was really easy and quick to make, and now I am excited to make a smaller one for Keenan and perhaps one for the dolls as well.
We have here in town a lovely store, that among many other crafty items and natural fibers, sell leather scraps by weight,  I got a rather large piece for a couple of dollars, gotta love that:)
I cut it into five pieces, the back and lid one piece, two side pieces, one front piece and one bottom piece, as well as two smaller strips, not pictured for the belt loop in the back  
with this lovely tool I punched holes all the way down the bottom, the tool easily punches through the two layers
(before that I did sew on the cross for the belt to slide through)
then sewed it together using a hemp string
then added the front piece to the bottom, and then the two side. Only the corners were a little tricky to make nice. Then I sewed up the sides and
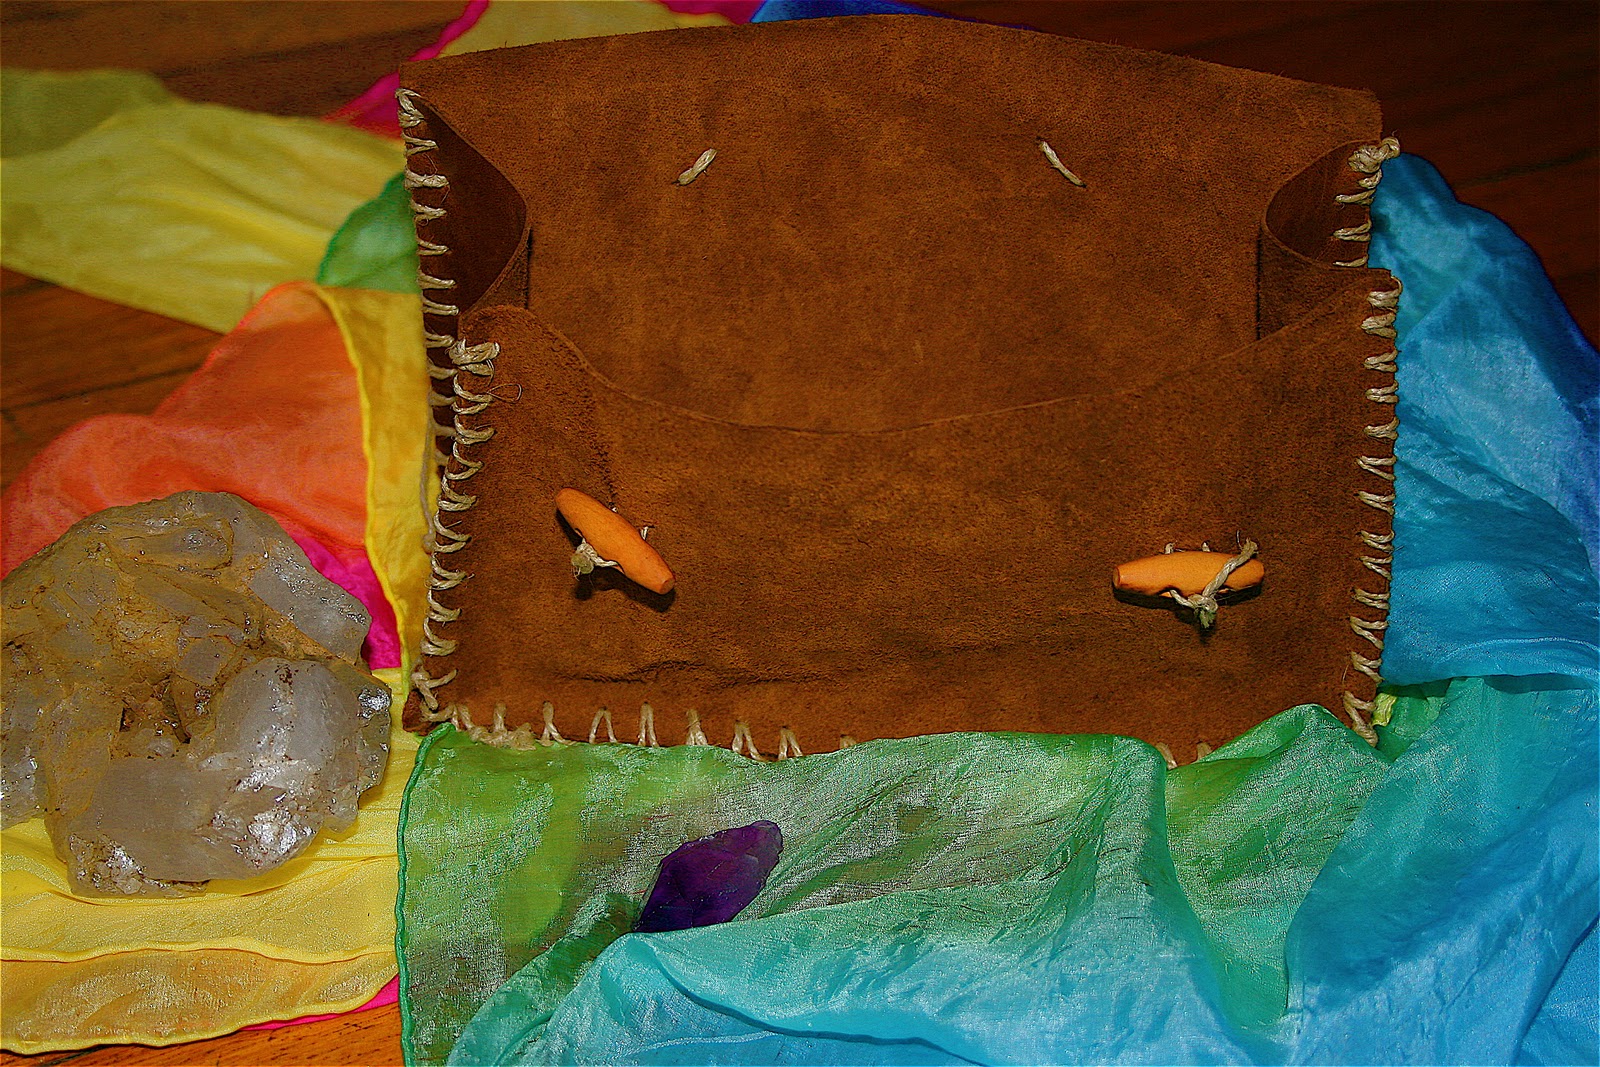
 added two wooden buttons to the front, and cut little slits in the lid to close it.
The only thing I will do but haven't yet is to add a shoulder strap, because for now I doubt she will wear it on a belt...
 After christmas she will have a lovely pouch for gathering all her treasures in, made with all my love
~may your sunday be full of joy~

Saturday, November 13, 2010

The yearly advent bags


Inspired by an amazing homeschooling Waldorf mama back in Miami, I have been using these simple advent bags to count down the days to Christmas since Kaleena was two years old.
I have actually been using the same bags every year until this years. As I have mentioned so many times already, most of our belongings are boxed and stored, and that is also true of our christmas treasures, so this year I made a new collection of bags.
I keep it really simple, I use plain paper gift bags and this time I used scrapbook paper, the first set I made I used an antique looking gift wrapping paper for the numbers.
Then on the first sunday in advent the children wake up to find these bags strung on the wall using clothespins. The first year I tied each bag with a red ribbon, and the effect was lovely, but very 
time consuming and hard for the children to get down on their own, so since then we have used clothespins.
For the most part the surprise in the bag is a project to be made together during that day, some things repeat on certain days each year. The first bag always contains candles for the advent wreath, and that day we make the wreath together, make aebleskiver ( a danish tradition of round pancake like balls), and drink hot chocolate. On the 1st of dec we they always find pine branches in the bag and that day we get our tree. One day we bake cookies, another make christmas card for family and friends, and so on. Usually each sunday will hold a little simple gift. The children love this tradition and each day wake up excited to check on the surprises of the bags.
 To make them I simple take the paper of choice cut out the numbers from one to usually thirty, each year will be a little different depending on what day christmas falls on
  glue them on
and hang them....
clearly they have not been hung yet, I would usually have them on more of a straight line as to me it looks prettier:)
~A beautiful day to you~

Friday, June 25, 2010

Glowing ballon lanterns

In preparation for our weekend back yard camp out we decided to make some lanterns.
 This is such a simple project, and we have used this technique many times before, mostly to make little glass lanterns for Michaelmas or for Christmas decorations. Having used all available glass ware in the house for recent jam and herbal medicine making, we decided to use balloons instead.
(although glass lanterns would have probably been better suited for outside use)

(A few tips from this experience, next time I will not glue paper up so close to the knot as it makes it harder to take the balloon out once popped, also while you don't want to thick of a layer of paper, do make sure that there is an ample amount of glue on, at least enough that all paper is wet through, as this makes for a smoother surface and a bit harder lantern shell. the children's had not quite enough glue, and so had a bit more flimsy form, still beautiful though for sure.)


Ingredients are the same whether you use glass or balloons for your lantern;
watered down white school glue, tissue paper and paint brushes, and in this case balloons.


We then added strips of ripped up tissue paper with the glue unto the balloon


and once we had a couple of layers hung them up to dry.


Once dry, which took the better part of the day, we popped the balloon, and ended up with a scrunched up little raisin looking thing, the children did not like that part, yet they are easily straightened out once the balloon is removed. Then I cut around the opening and added a small candle, which of course I watch carefully.


Here they are all lit up, although you cannot really see it, as I haven't quite figured out how to take a picture without the automatic flash popping up (In my defense it is a relatively new camera, and I rarely read owners manual:) ) None the less, the children love their simplicity and warm glow.


Kaleena making a wish before bedtime.

We are looking forward to enjoying the effect of these lanterns around our tent,
and I will surely post pictures of this little event.
I do hope the weather holds up, saturdays forecast says it will, yet right now there is lots of thundering and threatening clouds.
Thanks for checking in,
and have a wonderful day!